A comprehensive prelisting kit for real estate can help you land new clients and grow your business. Since it requires so many different elements, you might be wondering how to create one and where you can find prelisting kit examples.
That’s why we’ve compiled a list of tips for creating a robust real estate prelisting kit. In addition to the essentials like a prelisting form, your kit should also introduce you as a real estate agent, offer client testimonials, and provide a certain level of personalization.
In this post, we’ll explain what exactly a prelisting kit is. Then, we’ll share four tips on how to create one. Along the way, we’ll share some Jigglar prelisting kit templates to inspire you. Let’s dive right in!
What Is a Real Estate Prelisting Kit (And Why You Need One)
Before we show you how to create a real estate prelisting kit, let’s go over the basics. You might be wondering, what exactly is a prelisting kit for real estate.
In a nutshell, it’s a comprehensive document that educates potential sellers about the listing process. So, why do you need to make real estate prelisting kits for your clients? Here are a few reasons to do it:
- Educate and inform clients about the listing process
- Build trust with clients
- Market your services
- Encourage potential clients to start the listing process
Essentially, a real estate prelisting kit serves as a crucial piece of marketing because it introduces you as a potential real estate agent and explains the listing process.
It’s also important to point out that you should typically present potential clients with their prelisting kit prior to an in-person listing appointment. Meaning, it’s meant for “warm leads”. A strong prelisting kit can help you turn a lead into a client.
How to Create a Real Estate Prelisting Kit (5 Tips)
Now that you know what a real estate prelisting kit is and why it’s important, we’re going to share some tips on how to create one. Along the way, we’ll share some prelisting kit templates from Jigglar that can help your streamline your real estate marketing.
1. Introduce Yourself
As we mentioned, a good prelisting kit should be thorough. You’ll want to take the time to introduce yourself and your real estate business.
For starters, consider including a cover page:

If you to build trust with your client, a custom cover page will go a lot further than a generic one.
With this in mind, you might want to incorporate elements of your personal real estate brand. For example, you can add your name, contact information, logo, and portrait. Jigglar’s editor makes it easy to add all of these elements.
Additionally, adding a personalized letter is a nice touch:

This way, the customer will know that you’ve gone the extra mile for them.
After that, be sure to introduce yourself more thoroughly using a page like the following:
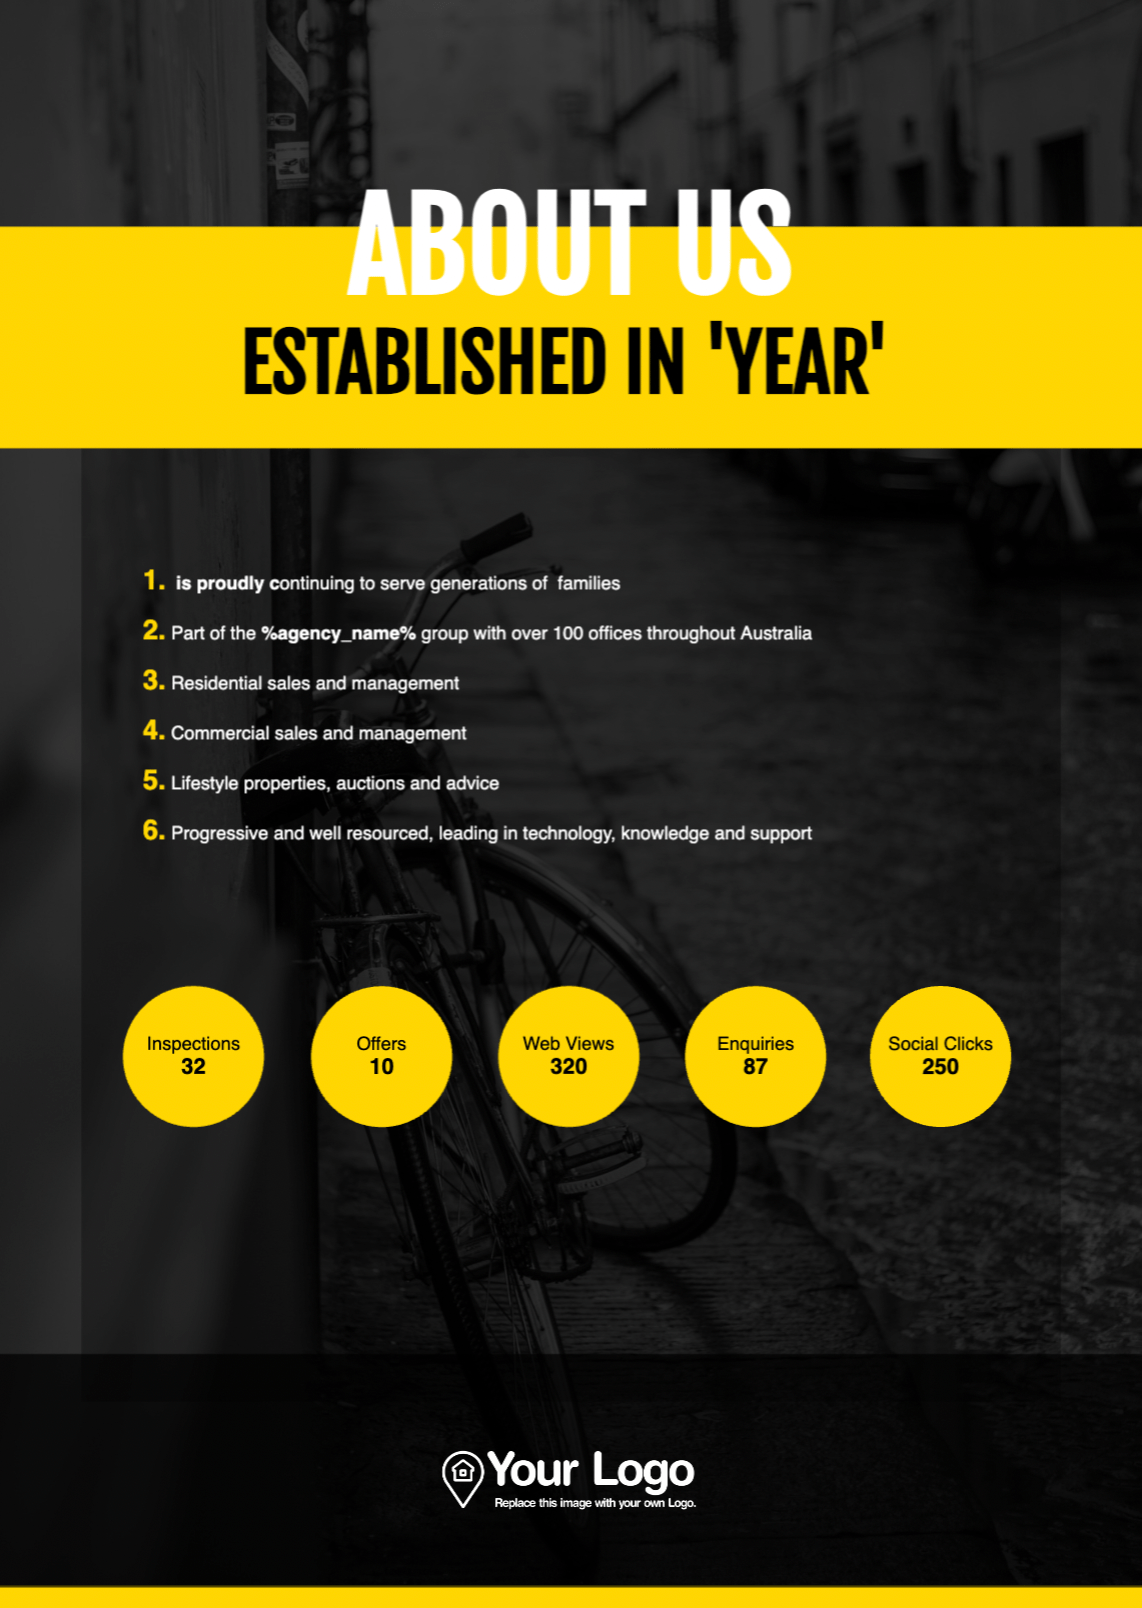
Remember, you’ll want to make sure that each page in your prelisting kit matches with the rest. Visual elements like colors and fonts should all be cohesive.
2. Outline Your Services
After you’ve introduced yourself, you’ll want to outline your real estate services. After all, that’s what your client is most interested in.
As an example, you could include a simple infographic that explains all your real estate marketing services:
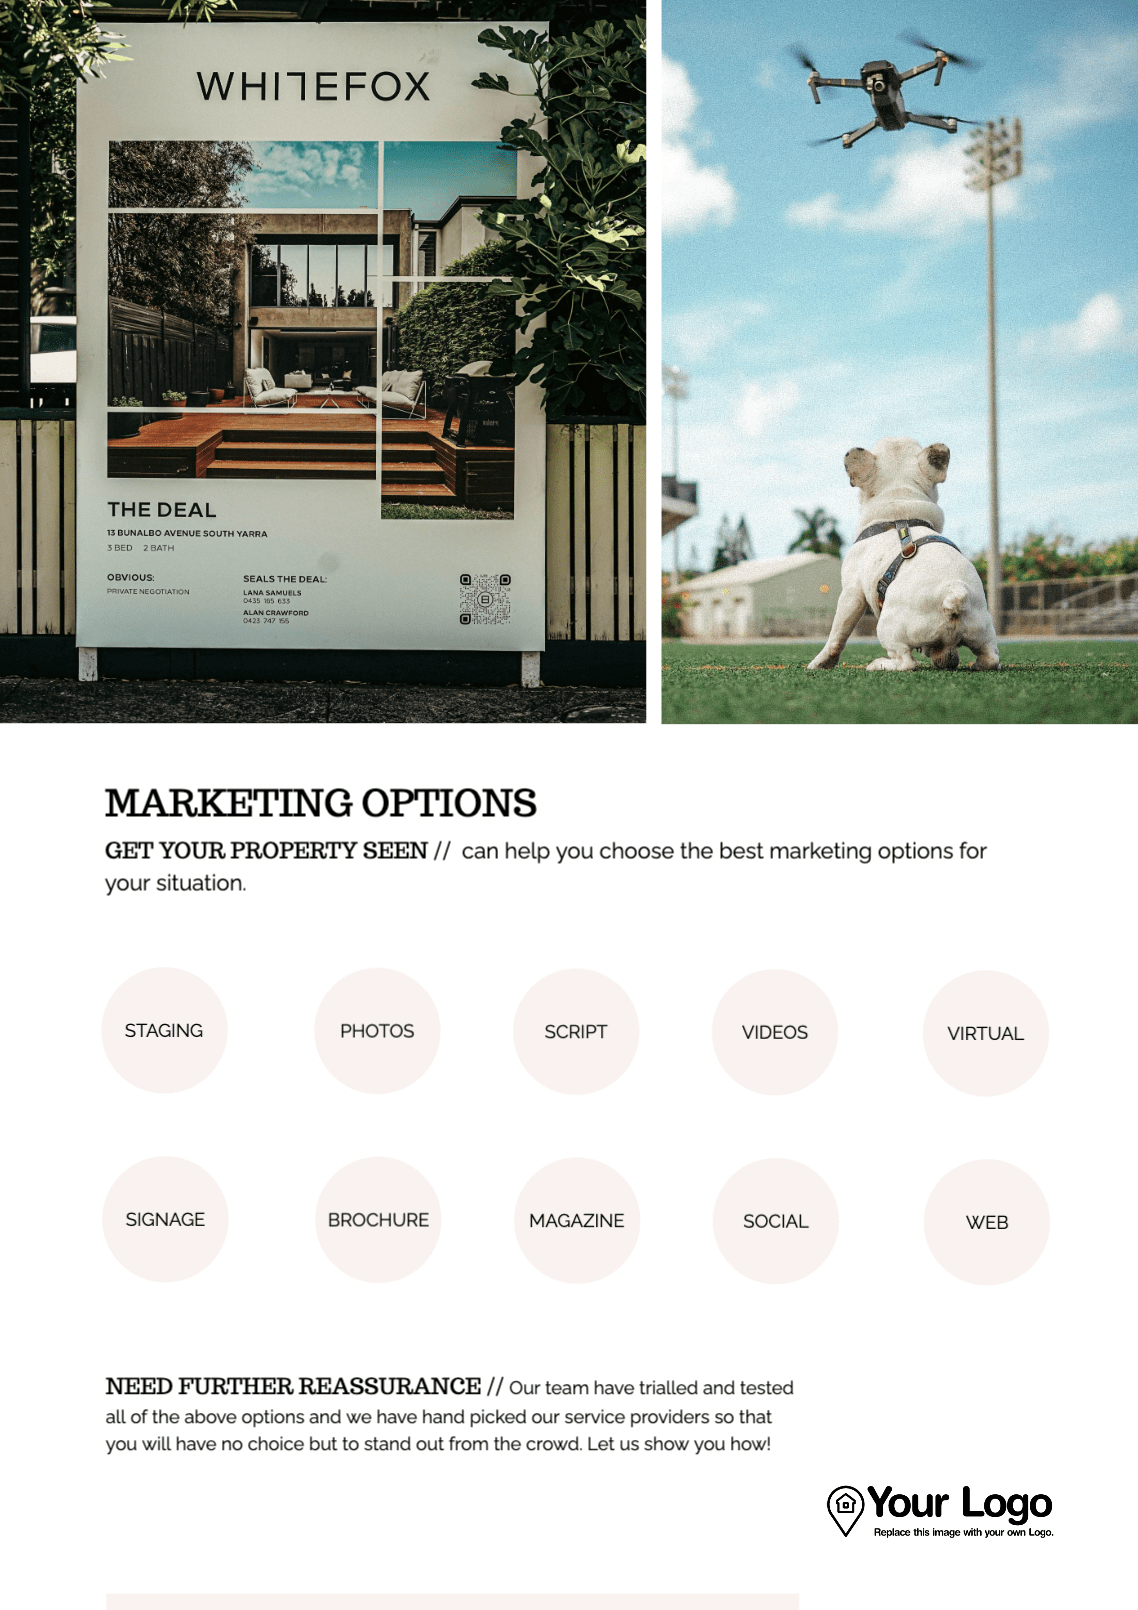
For instance, you might offer everything from staging to social media marketing.
You could then use the subsequent pages to communicate your philosophy, values, and even credentials:
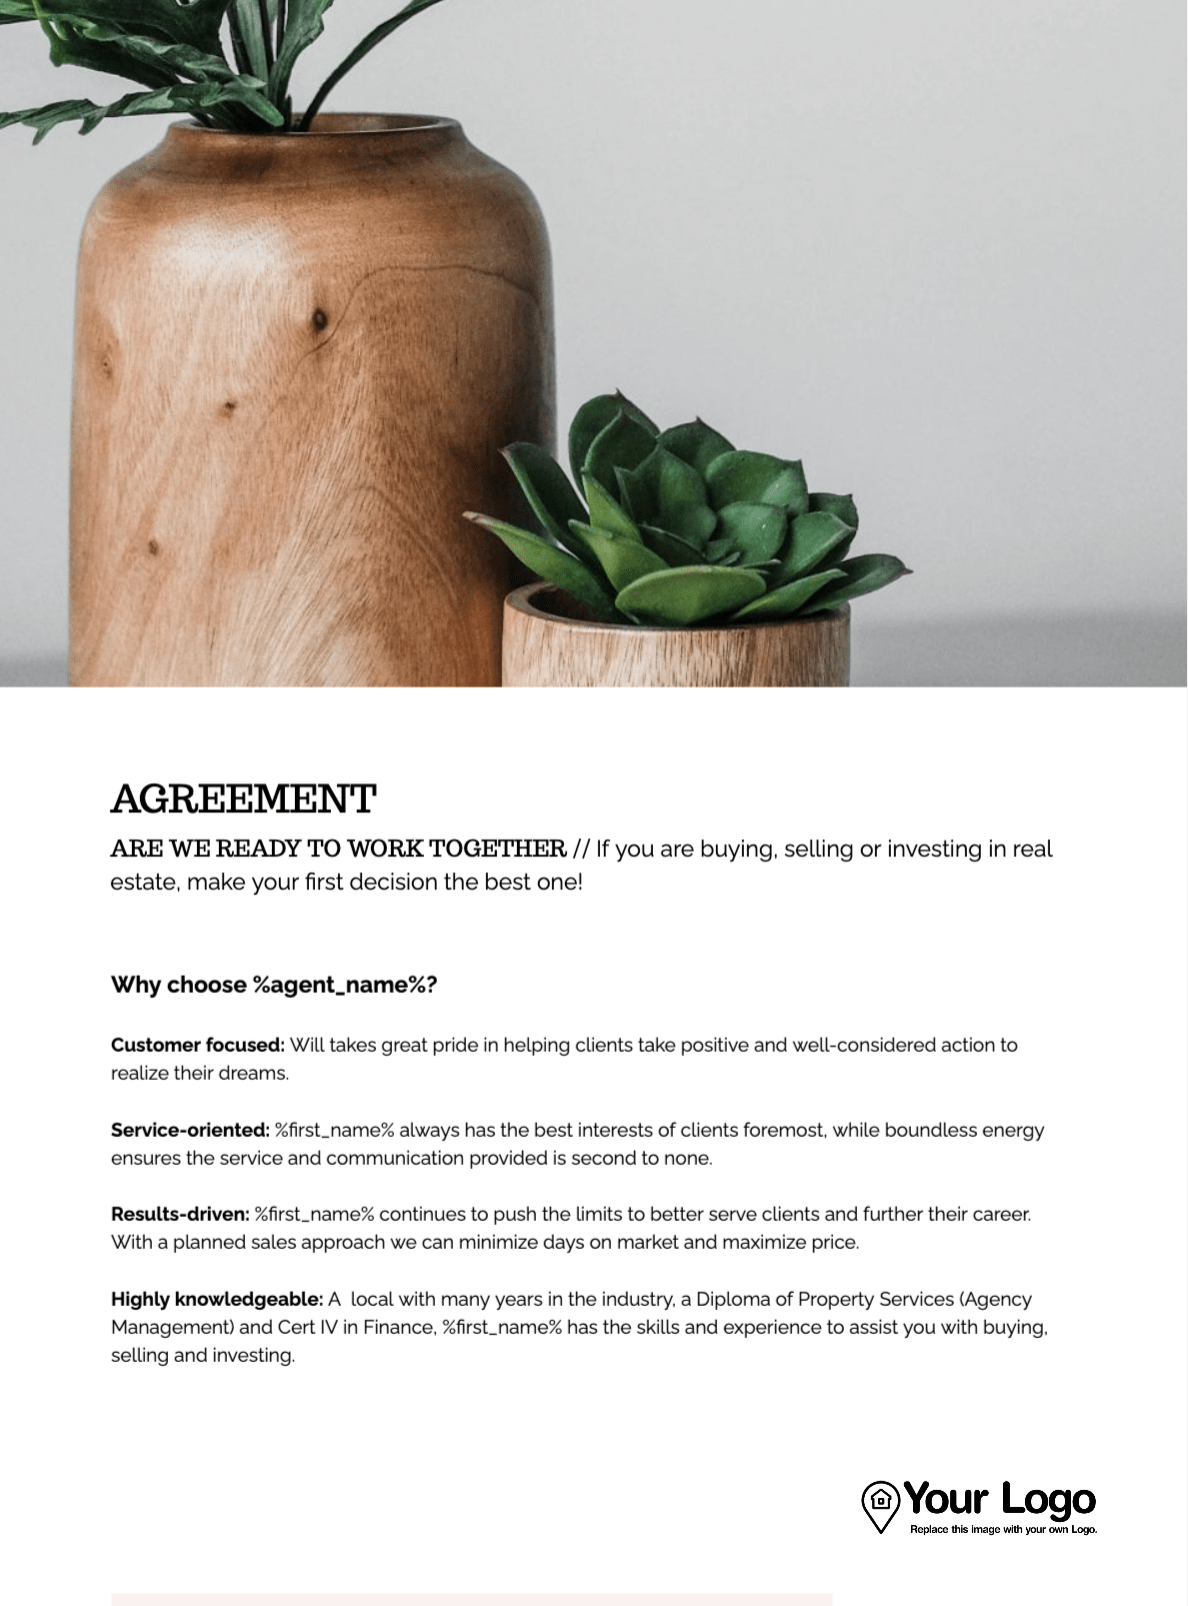
For instance, this would be a good place to mention any relevant certificates, diplomas, and other professional development.
Since this will likely be a more text-heavy page, you might also consider adding a visual like an eye-catching image.
3. Share Testimonials and Highlight Recent Sales
Whether you’re a new real estate agent or a veteran associate, you probably already know that listing a home is a huge decision. Therefore, your potential clients might need some more convincing.
So, after you’ve outlined your real estate services, you can share some client testimonials:
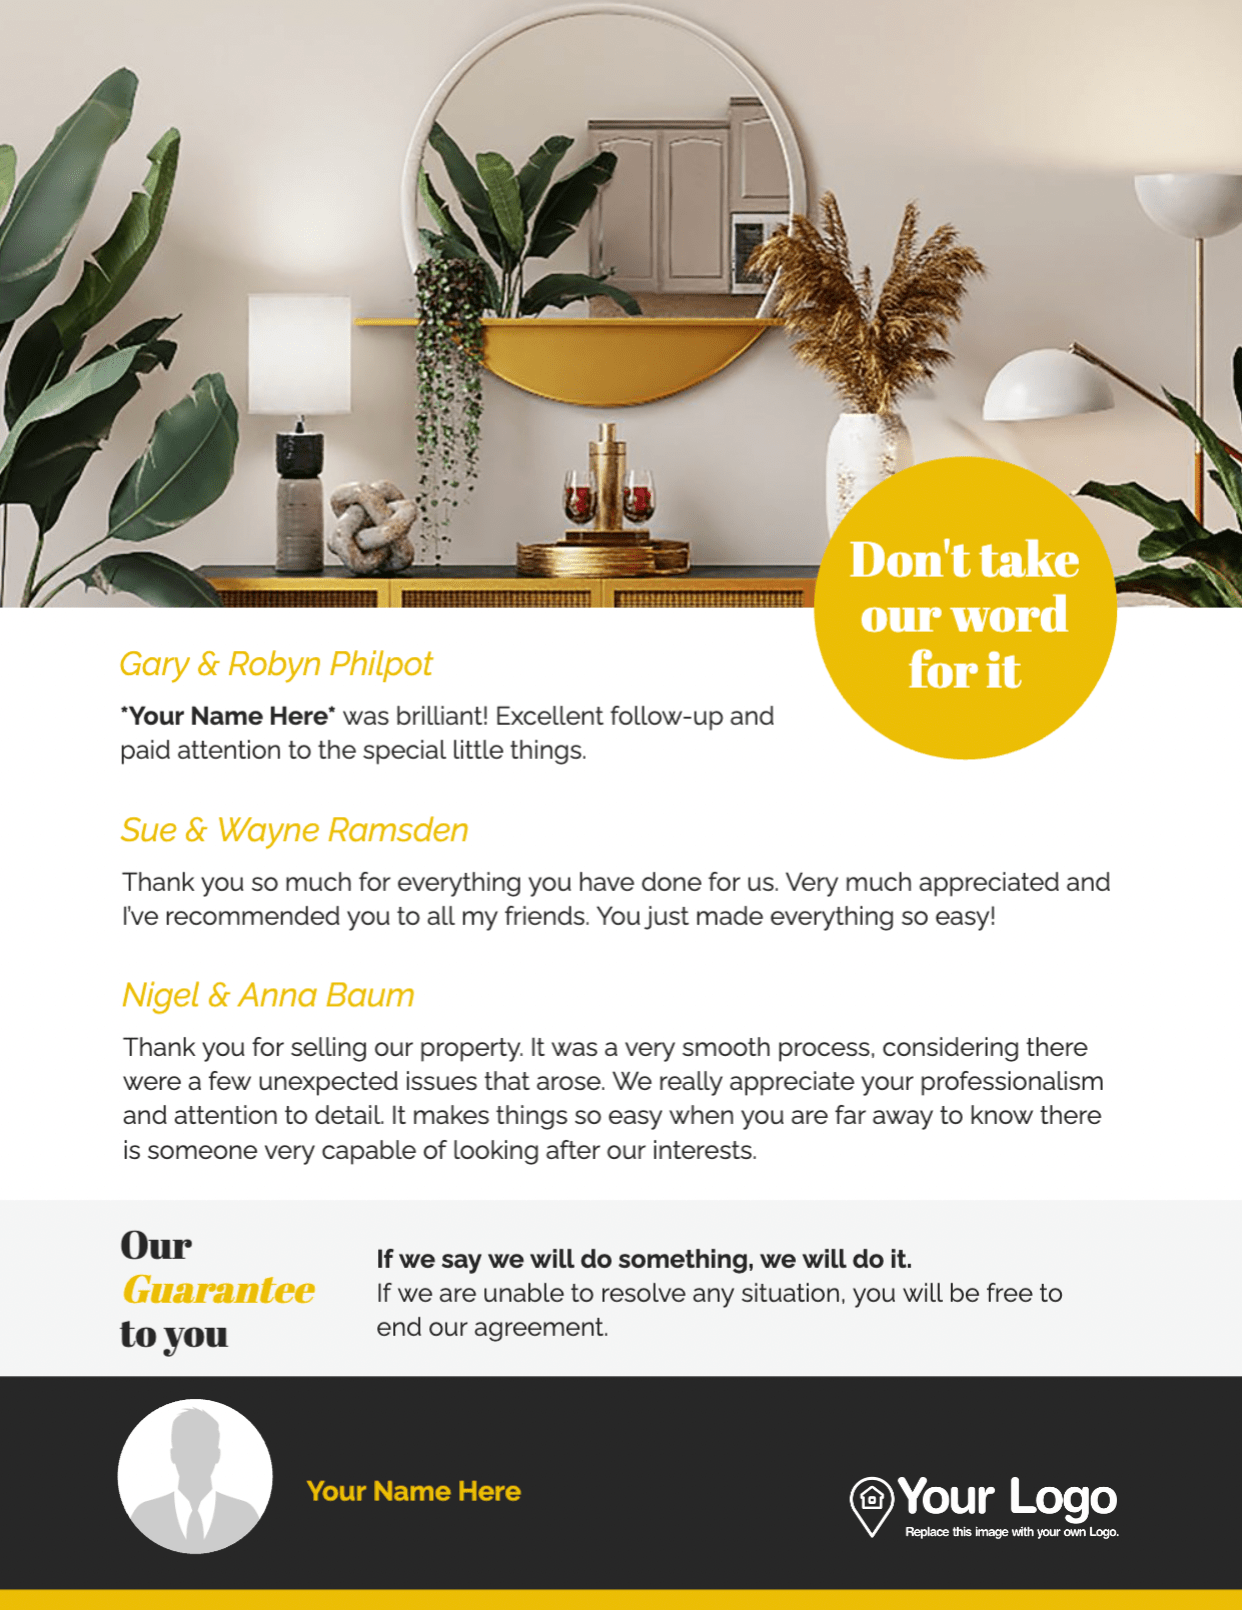
This can further build trust with your clients. If possible, you can even highlight some of your most recent sales:
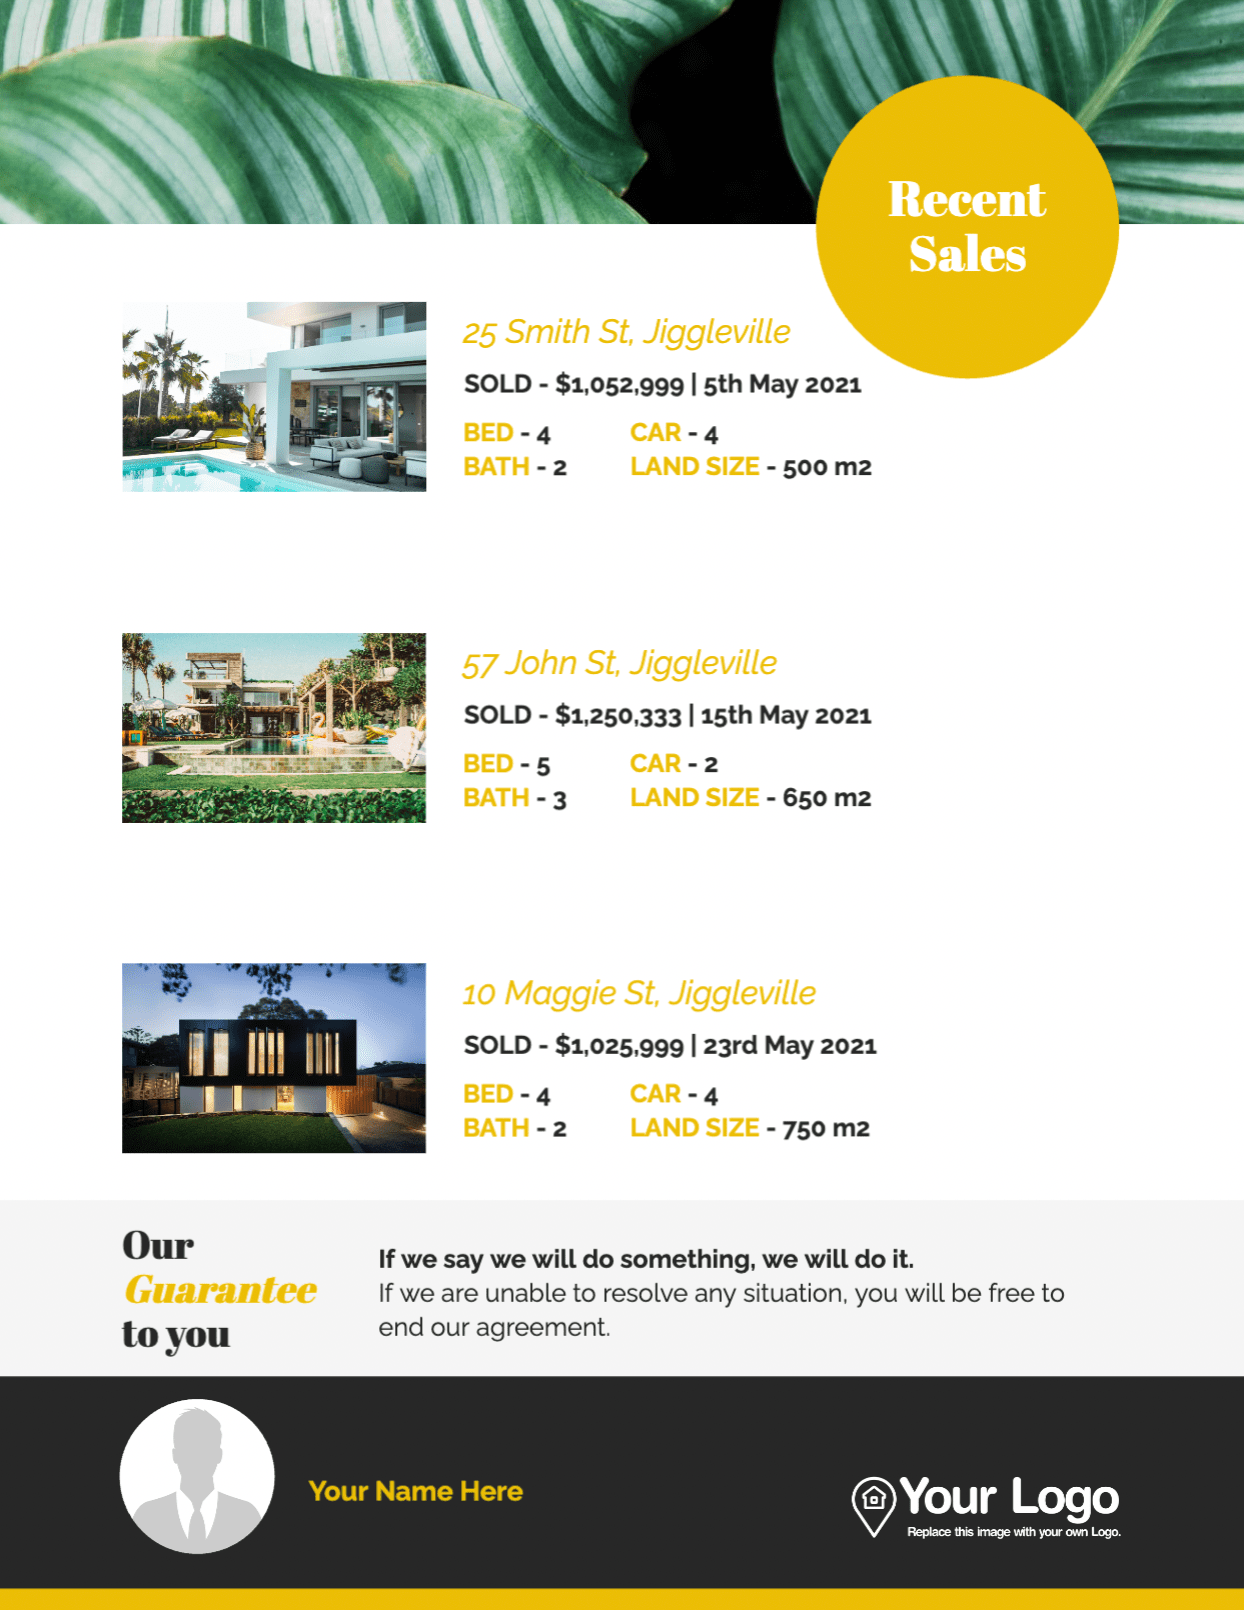
Here, it’s best to include homes that share some similarities with the potential client’s property. For instance, you might have a lot of experience selling in their neighborhood, or selling their specific type of property (such as a vacation or luxury home).
4. Include a Prelisting Form
At the end of the day, the goal of any real estate prelisting kit is to convert a lead into a client. Therefore, you’ll want to make sure to include a prelisting form.
This is essentially a questionnaire to gauge the client’s interest and whether they’re interested in next steps. Ideally, it should be straightforward and easy to fill out:
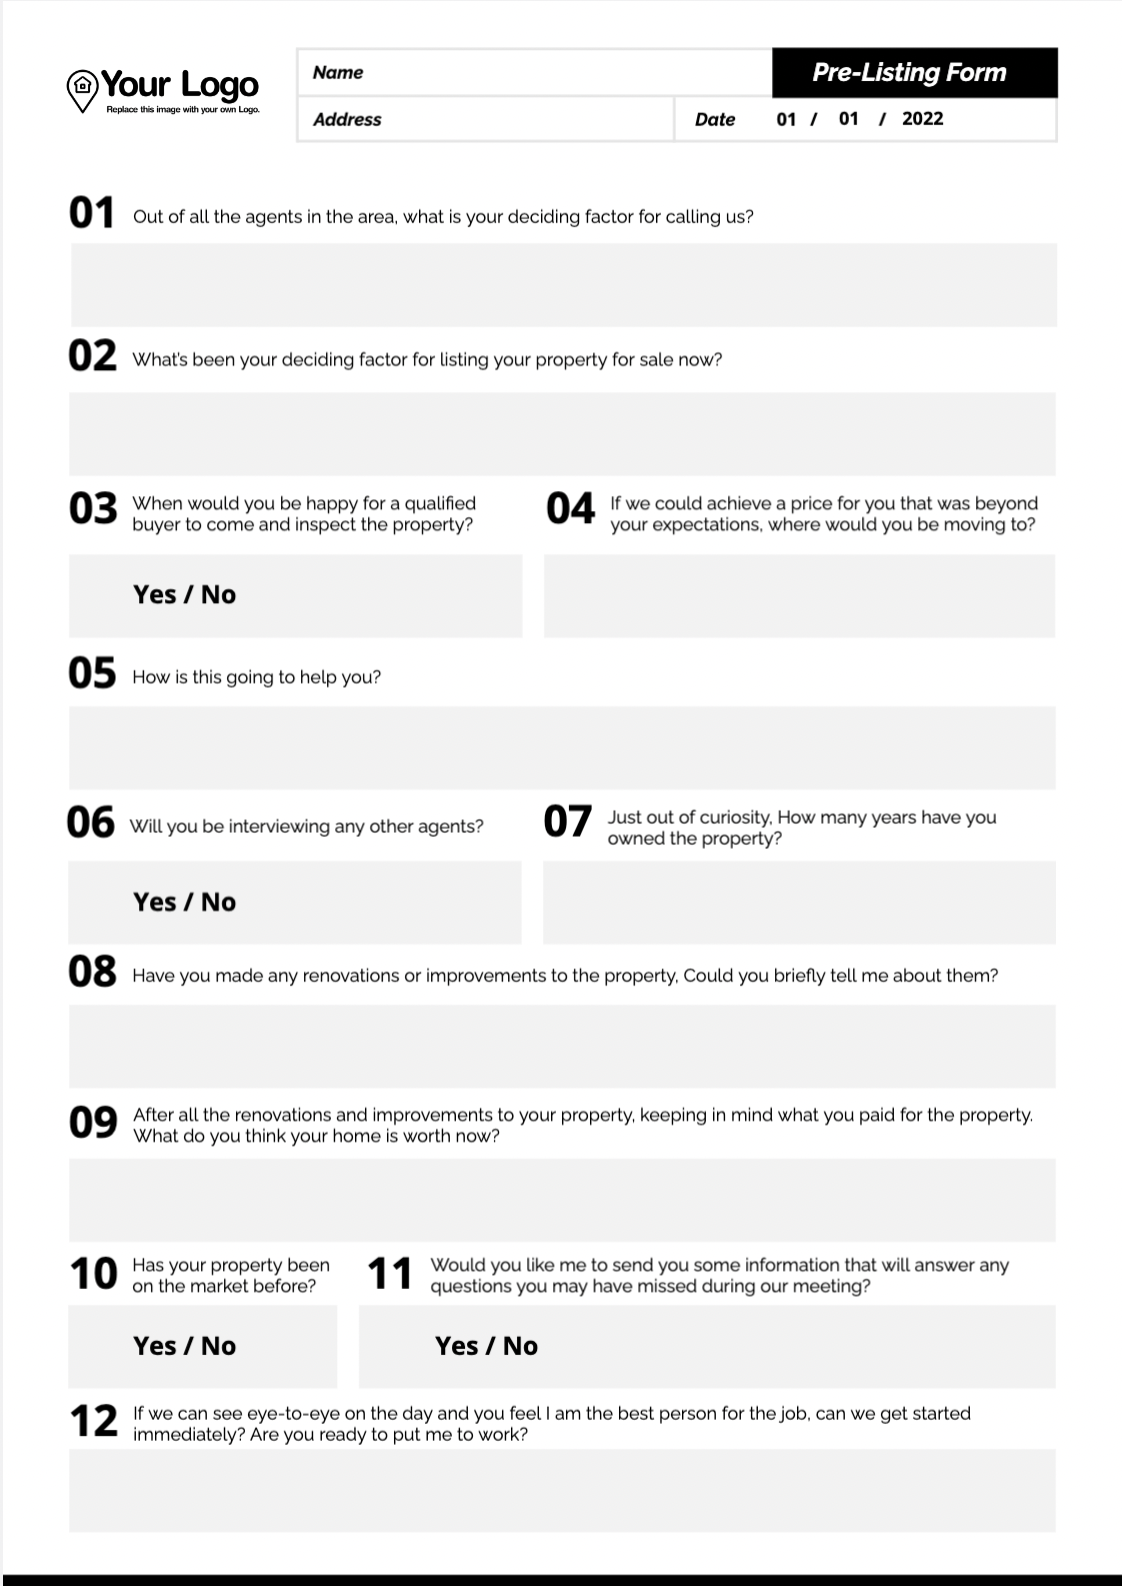
With Jigglar, you’ll get several prelisting form templates similar to the one above.
Remember, this is also your last opportunity to market yourself. So, consider incorporating your logo and any other appropriate branded design elements one more time.
Conclusion
A quality real estate prelisting kit can help you win more clients. It provides crucial information on the listing process, while also allowing you to make a good impression and build trust. However, building a prelisting kit with all the right elements may seem like a daunting task.
To recap, here are four tips for creating a convincing prelisting kit for your potential real estate clients:
- Introduce yourself.
- Outline your services.
- Share testimonials and recent sales.
- Include a prelisting form.
Did any of the real estate prelisting kits feature in this post catch your eye? If so, you can sign up for a Jigglar free trial to use them today!