Photos are a crucial component of your real estate listings. They give home seekers a visual idea of the property, piquing their interest. However, you’ll need to make sure you’re using the right images.
Fortunately, it’s not that difficult to take great photos for your listings. For example, it may simply involve choosing the right angle and finding the best light. With high-quality photos at your disposal, you can help drive more interest and secure more sales.
In this post, we’ll look at some photography tips for property listings, and show you how to use photos effectively in our Jigglar templates. Let’s get started!
1. Get the Hero Shot
Your hero shot is the picture you think will generate the most interest in your listing. This could be any part of the home. However, it’s typically an exterior shot, meaning you need to consider the time of day you shoot.
Natural lighting will be best during the golden hours, just after sunrise and before sunset. This will cast the home in a soft, warm glow. Additionally, the sun will be low and you can use it to light the back, front, or side of your property.
You can then use your best hero shot in your marketing material. For example, our Jigglar templates enable you to showcase large images of your listings:
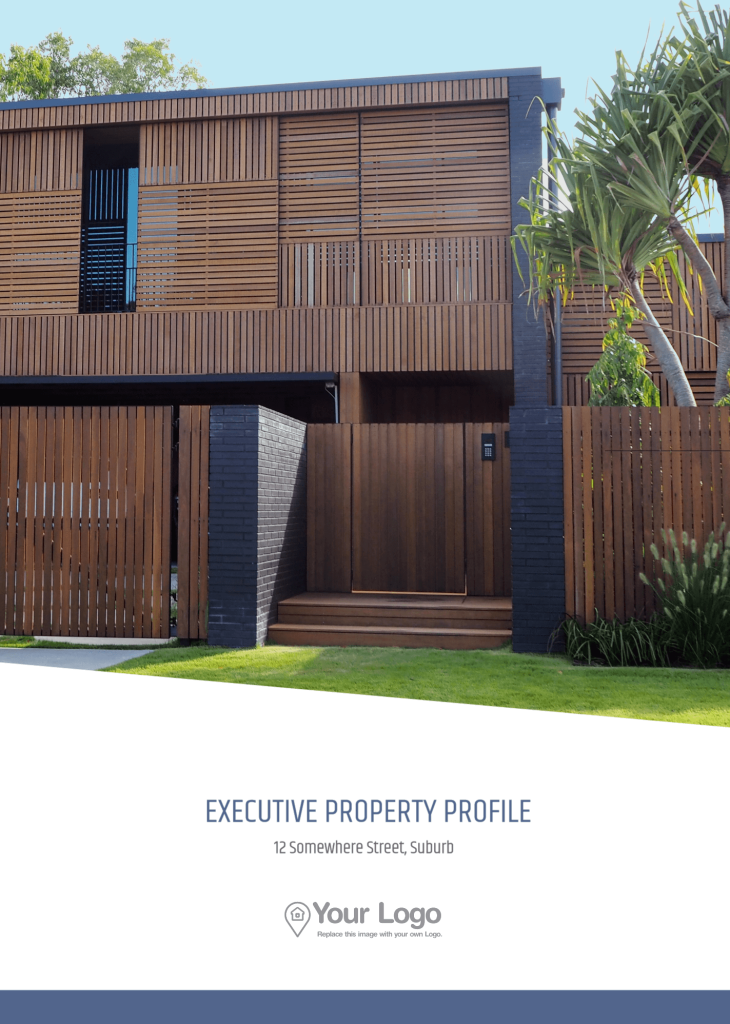
You might use your hero shot as the cover photo for an in-depth listing brochure. All you have to do is remove the placeholder image and replace it with your own!
2. Clean and Stage Rooms
Along with the hero shot, you’ll want to use a selection of interior photos of clean, staged rooms. This can help put the home in the best possible light for viewers.
Plus, it gives home seekers a sense of each room’s use and size. It can also create an emotional connection, prompting them to look at the home in person.
Our Jigglar templates give you space for the hero shot as well as interior photos. You can use these room images on open-house adverts, property profiles, and more:
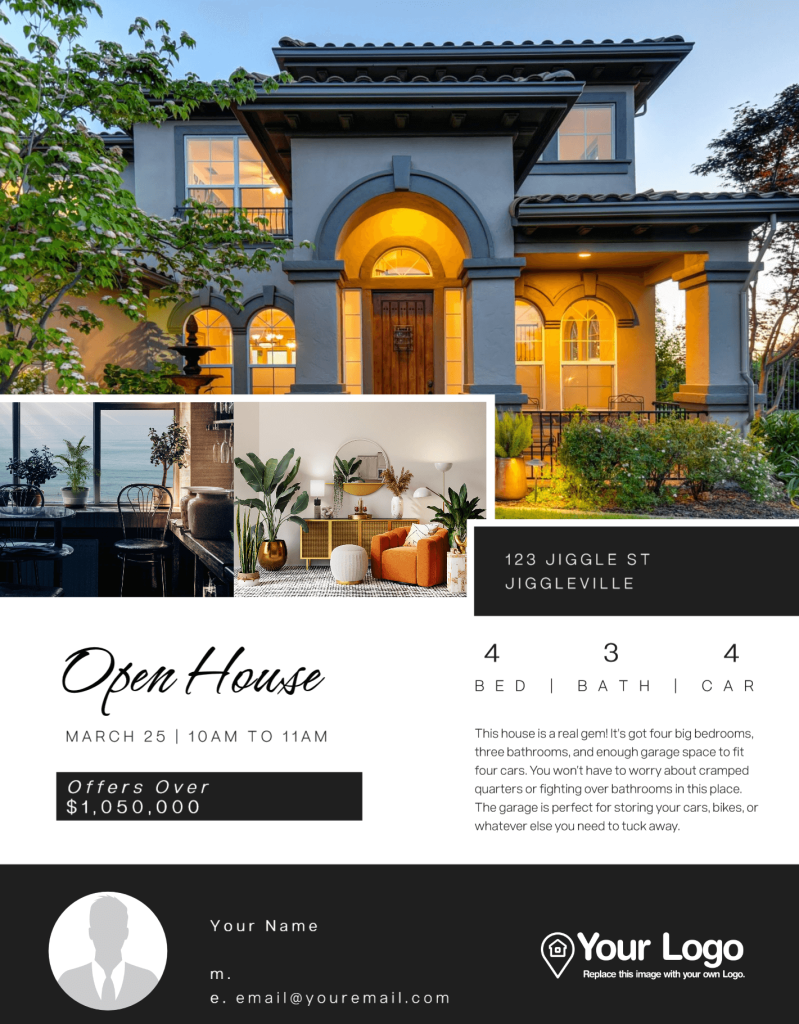
While you’ll want photos of every room, in many cases it makes sense to only use the standouts. After all, there’s often limited real estate on marketing material.
3. Use a Shot List
Using a shot list can help ensure that you’re getting everything you need at each property. For example, you’ll want to take photos of the living room and kitchen, front and back exteriors, bedrooms, and bathrooms.
It’s a good idea to walk through the property before the shoot. This will help you visualize where and how you want to set up your camera.
In general, you’ll want to aim for 25 photos, as that’s the standard for most multiple listing services. However, if you produce your own marketing material, you can include as many photos as you want.
Jigglar’s templates are fully customizable, enabling you to resize image boxes, reorganize objects, change colors, and more:
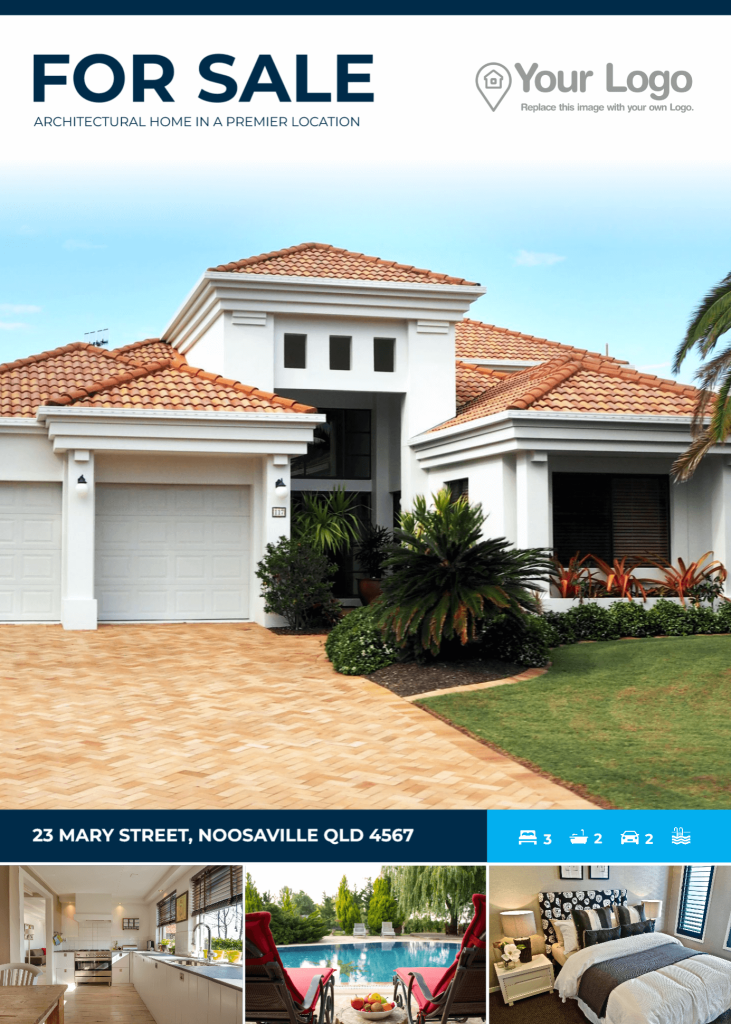
You can create for-sale flyers with as few or as many pictures as you’d like. However, as mentioned earlier, it’s usually better to just use the highlights.
4. Shoot at Chest Level
One of the most important photography tips for property listings is to shoot at chest level. This usually offers the most balanced perspective of a room. This gives the image a natural feel and helps avoid distortions in the photo.
Every room is different, so you may need to make adjustments as you go. The specific features of a room, like high countertops, might call for you to change your camera height.
With Jigglar templates, you can complement your photos with dynamic layouts:

For instance, you can crop them as you see fit, and place them within frames with interesting shapes.
5. Use the Right Equipment
Using a DSLR or mirrorless camera with a wide-angle lens can help you tackle small spaces in a property. It also enables you to capture more of the larger spaces and exteriors than standard lenses or camera phones.
As we mentioned earlier, you’ll generally want the camera to be at chest height for the best perspective. In addition, you’ll need it to be level and facing straight. This means bringing a tripod to your shoots.
If you’re taking wide-shot photos, you can use them for your Facebook page covers:

Jigglar offers several templates for Facebook covers, which you can use to promote new listings or an event.
Conclusion
High-quality visuals are a key component to marketing your property listings. They can lead to more viewers, faster sales, and higher prices. However, if you want the best results, you’ll need to do more than snap a few photos with your phone.
To recap, here are five key photography tips for property listings:
- Get the hero shot.
- Clean and stage rooms.
- Use a shot list.
- Shoot at eye level.
- Use the right equipment.
Are you ready to create property listings that grab buyers’ attention? Sign up for a Jigglar free trial to get started!